
Last updated Oct 13, 2025.
Generate Images using Qubrid AI’s ComfyUI Template
3 minutes read

Shubham Tribedi

This tutorial walks you through how to configure the ComfyUI Template on a GPU Instance and use it to generate images using text-to-image models.
ComfyUI is a node-based graphical interface for creating AI image generation workflows. Instead of writing code, you visually connect components to build pipelines, making experimentation easy and intuitive.
This guide uses the Stable Diffusion v1.5 model - a reliable model from Stability AI - to keep things simple and easy to start.
💡 When using ComfyUI, always ensure your workflow matches the model type. Loading a workflow made for another model (e.g., SDXL or Flux Dev) can result in slow performance or poor image quality.
What You’ll Learn
Deploy a ComfyUI Template on GPU
Connect to the ComfyUI web interface
Create or load workflows
Install models
Generate your first image
Requirements
Before you begin:
Minimum $10 in wallet credits
Basic understanding of AI image generation concepts
Step 1: Deploy a ComfyUI Template
Deploy a GPU instance using the ComfyUI Template preloaded with the ComfyUI Manager plugin.
1. Select the ComfyUI Template
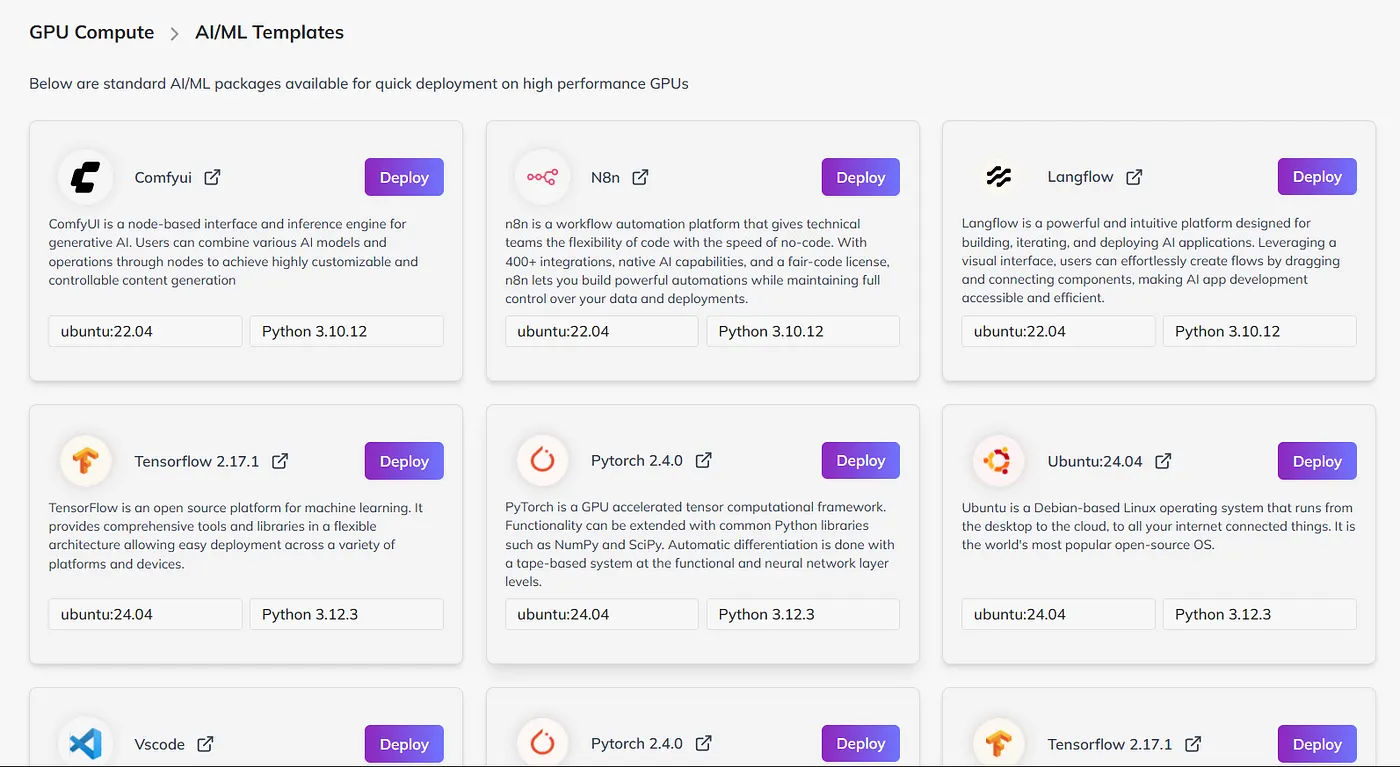
2. Configure Your GPU Instance
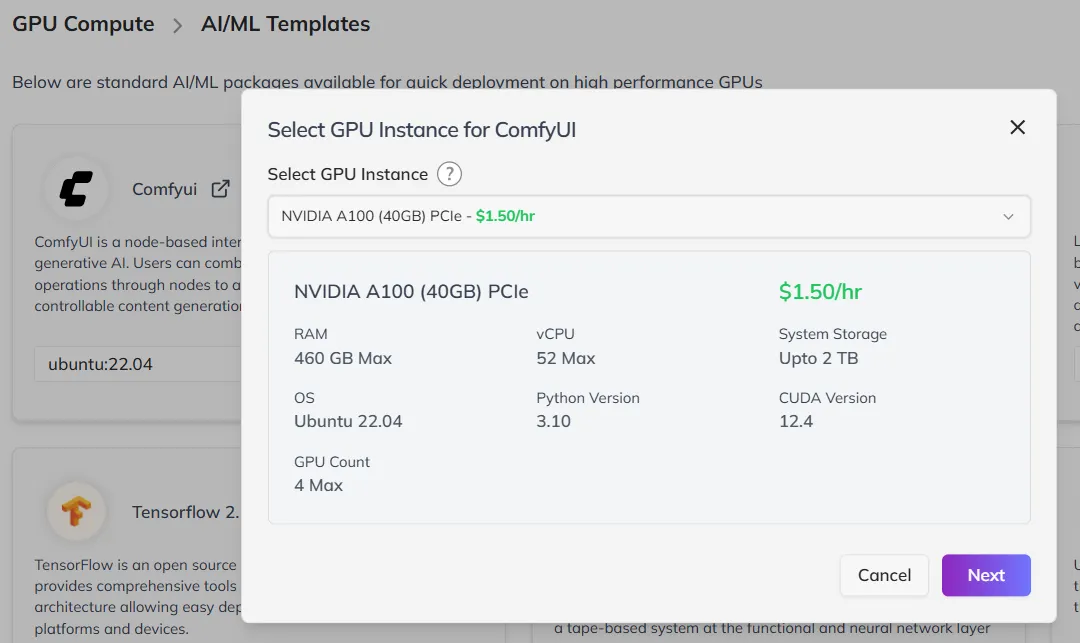
GPU Selection
Choose A100 or higher-end GPUs for optimal performance.

GPU Count
Choose 1 GPU (sufficient for SD-1.5) or more based on complexity.
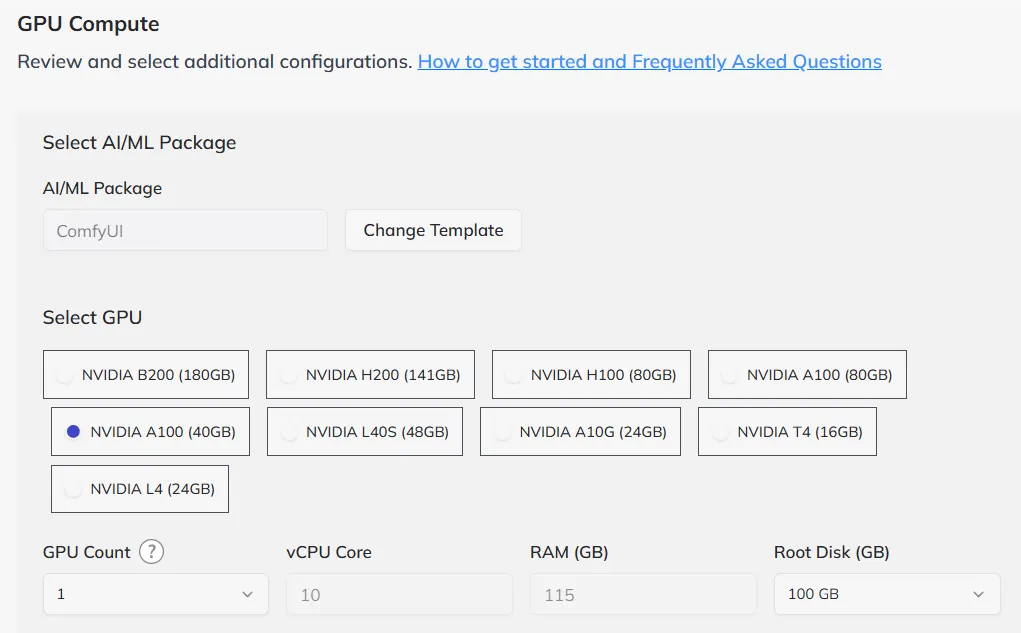
Storage
Default disk space works for SD-1.5, but you can increase it.
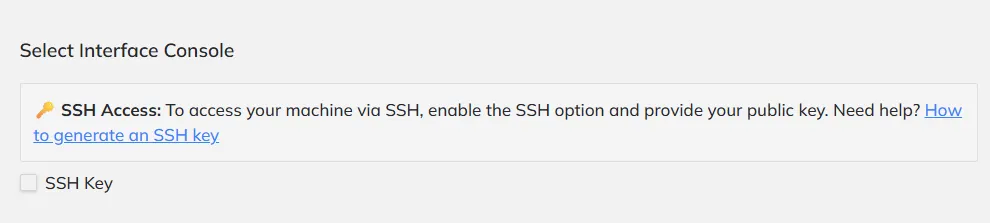
SSH Keys
Optional - you can add SSH keys for access if needed.
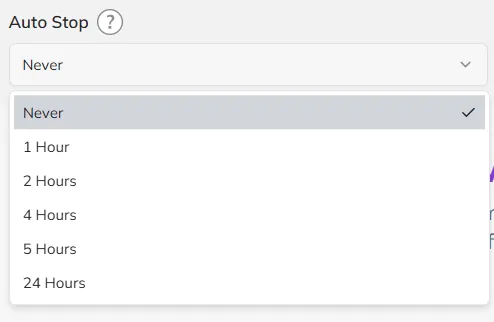
Auto Stop
Keep default or configure as per your usage pattern.
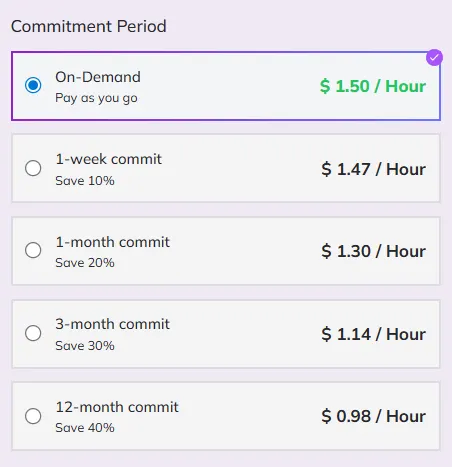
Commitment Period
Select On-Demand for flexibility and pay-as-you-go.
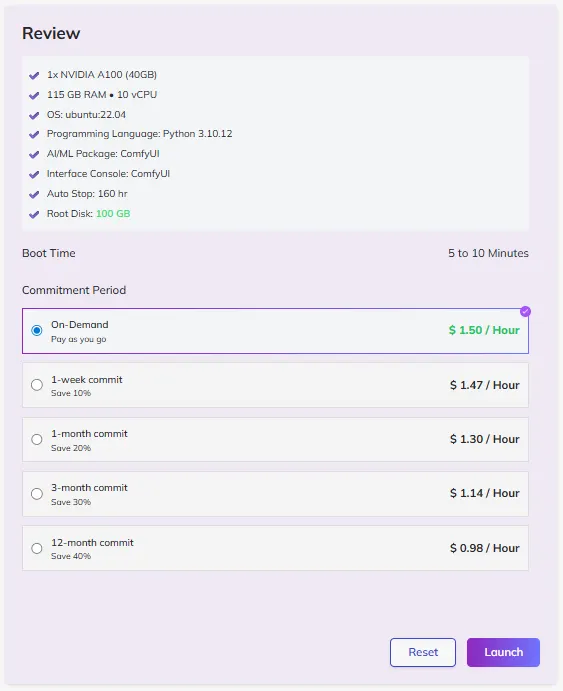
3. Launch the Instance
Click Launch to deploy. It may take 5–10 minutes to initialize and start the ComfyUI service.
Step 2: Open the ComfyUI Interface
Once the instance is running, click the redirect link to open ComfyUI in a new browser tab.
Example URL:https://[DEPLOYED-IP]:8188
Step 3: Load or Create a Workflow
When ComfyUI is ready (port 8188 active), create a new workflow or use a ready-to-use template.
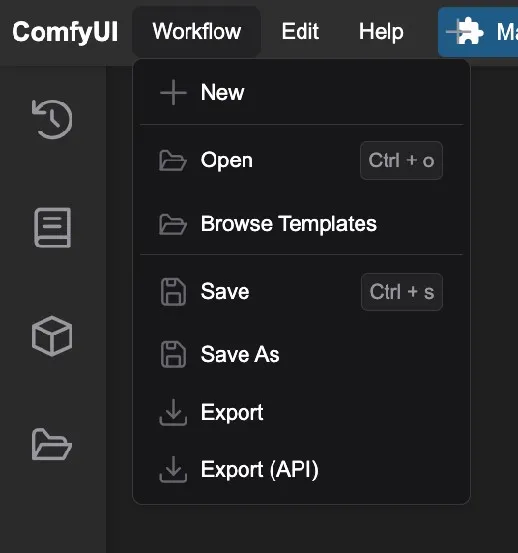
Import the workflow:
Go to Workflow → Open → Select downloaded file.
Step 4: Install the Stable Diffusion v1.5 Model
When you load the workflow, you’ll see a Missing Models popup — this means model weights aren’t pre-installed.
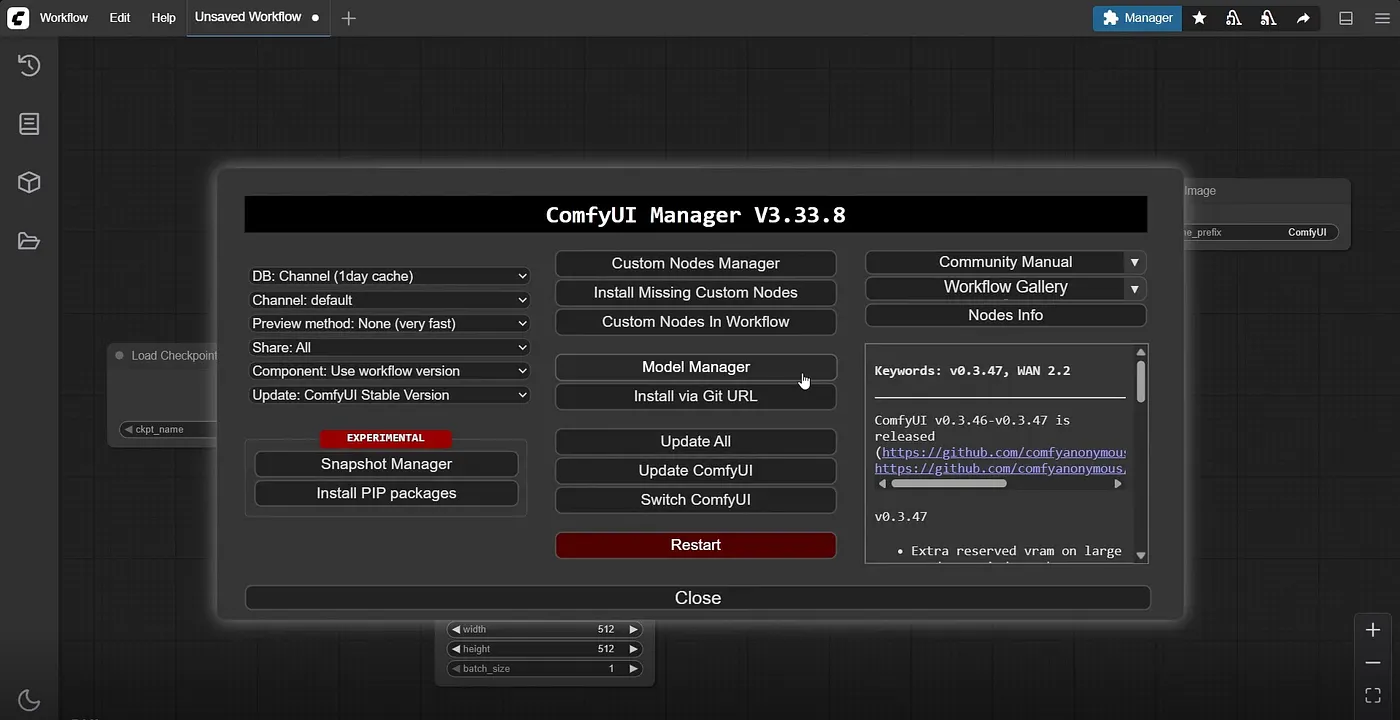
Open the ComfyUI Manager
Click Manager → Model Manager from the top-right menu.
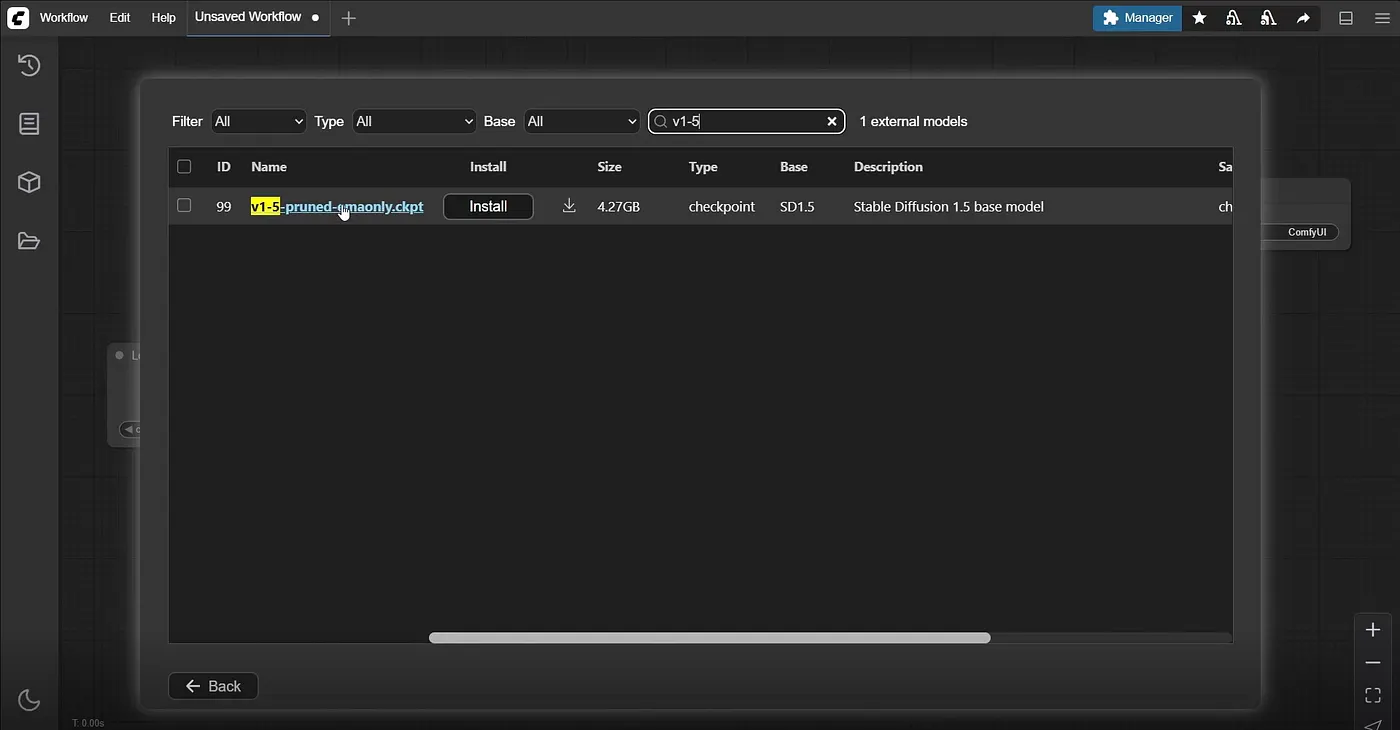
Install Model Checkpoint
Search for v1-5-pruned-emaonly.ckpt → Click Install.
You can also get it from Hugging Face.
Refresh Interface
Press CTRL/CMD + R to reload ComfyUI after installing.
Configure the Checkpoint Node
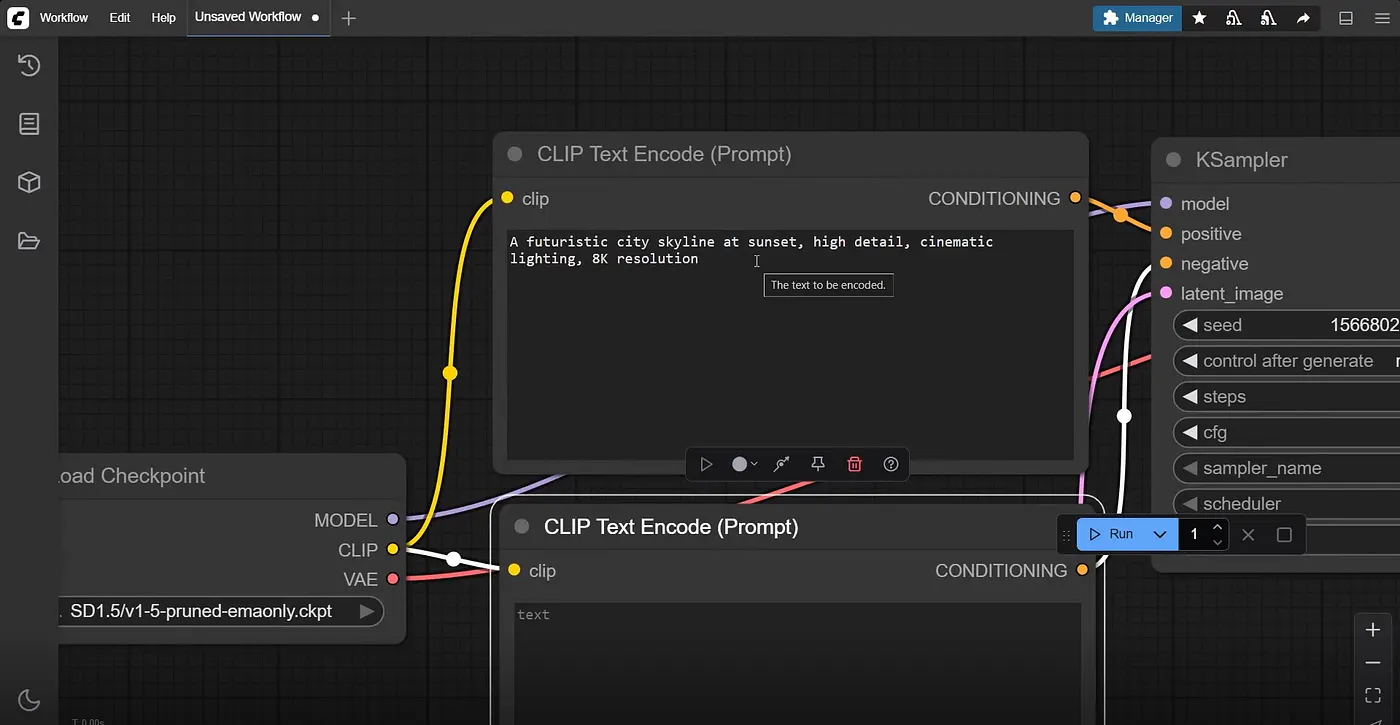
Find the Load Checkpoint node in the workflow. Under ckpt_name, choose SD1.5/v1-5-pruned-emaonly.ckpt.

Step 5: Generate an Image
Now your workflow is ready.
Customize Your Prompt
Find CLIP Text Encode (Prompt) → Enter a description:
Examples:
“A serene mountain landscape at sunset with a crystal-clear lake.”
“A futuristic cityscape with neon lights and flying cars.”
“A detailed portrait of a robot reading a book in a library.”
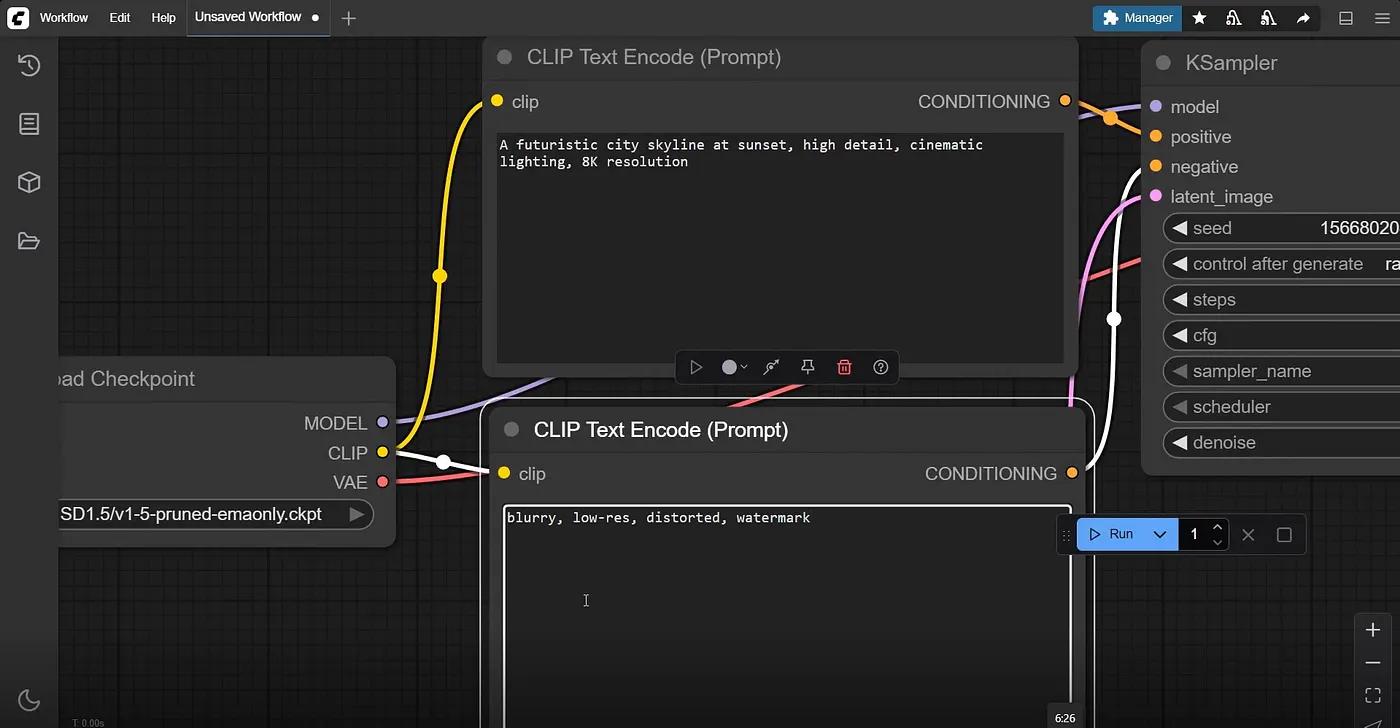
You can also add a Negative Prompt to avoid unwanted styles or artifacts.
Start Generation
Click Run (or press Ctrl + Enter). The workflow executes sequentially:
Text encoding
Model loading
Image generation
Output rendering
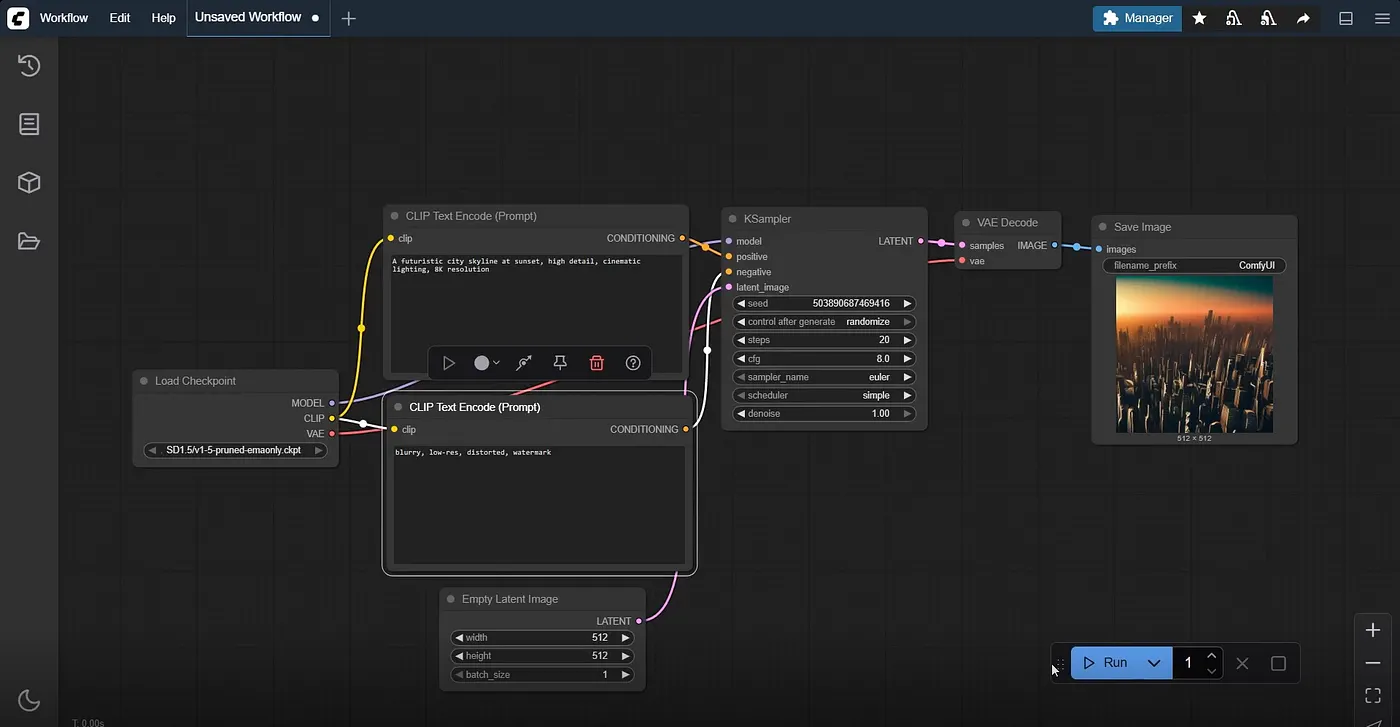
View Your Result
Once complete, the generated image appears in the output node.
Right-click → Save Image or View Full Resolution.

Conclusion
Congratulations! 🎉 You’ve successfully deployed and generated your first image using Qubrid AI’s ComfyUI Template. This template drastically simplifies the process - no complex setup, just deploy and create.